Got a new iPad? Came across a scrumptious recipe? Had an unbelievable victory in a game? Found the most picturesque scenery? Or an exciting post on Facebook or a web page? All this makes you wonder how to screenshot on iPad Pro 2020? Don’t worry. You are at the right place.
In my article today, I will guide you on how to take a screenshot on iPad pro. Although iPad comes packed with the most outstanding features, it also includes a fantastic built-in feature to let you take screenshots. Screenshots help you capture information and automatically save it on your device.
You also don’t need to look for options to download the content; instead, you can screenshot directly. There are several different ways you can take a screenshot on your iPad Pro. In my article, I will walk you down the other methods you can use for capturing a screenshot step by step.
Table of Contents
How to take a screenshot on iPad Pro 2020 with volume button or power button and home button

The first method of taking a screenshot on an iPad is by using a power button or volume up button and a home button. It is the most commonly used process for taking screenshots on any phone or tablet. This whole process is super easy. You need to follow the steps given below.
Step # 1
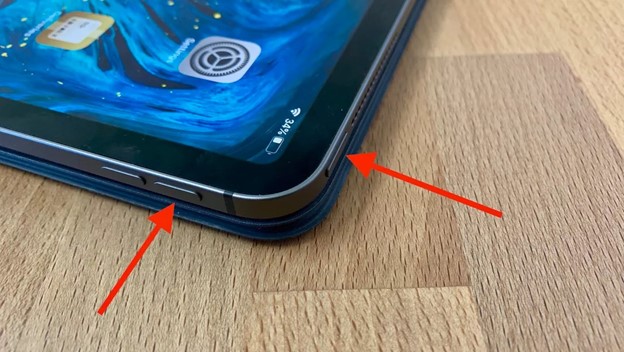
First of all, you need to locate the top power button on the upper right of your Apple iPad. It is an oval-shaped top button on your tablet. At the same time, the home button is located just underneath the iPad display.
It is, in fact, the only button you can see on the front of the iPad screen. But, if you are using the iPad Pro 2020, you may need to use the up button instead. It is because there is no home button on the iPad Pro 2020.
Step # 2
Bring your iPad screen to the content you wish to take a screenshot of. Now press the top button, tap the Home button simultaneously for a few seconds, and release both.
But, if you have iPad Pro 2020, you must simultaneously press the top button and the volume up button. Then, after a few seconds, let go of both buttons.
Step # 3
As soon as you release the buttons, you shall hear a faint shutter noise if your iPad is not in silent mode. You will also see your screen flash for a moment indicating screenshot capture.
Step # 4
Once you successfully take a screenshot, it will get automatically saved in the camera roll in the Photos app.
Step # 5
To view and edit the screenshot, tap the photos app with a multicolored flowers thumbnail. Once the app is open, swipe to the bottom corner of your display screen to view the screenshot.
How to take a screenshot with Assistive Touch on iPad Pro 2020

Assistive touch is a feature that comes in the IOS of iPad mini, iPad Air, and all Apple iPhone mobile devices. It is a feature that allows you how to take a screenshot on iPad Pro 2020 with an on-screen menu.
This menu helps you perform different actions that require you to press multiple buttons. So, if you find it challenging to press various buttons, just read on.
Step # 1
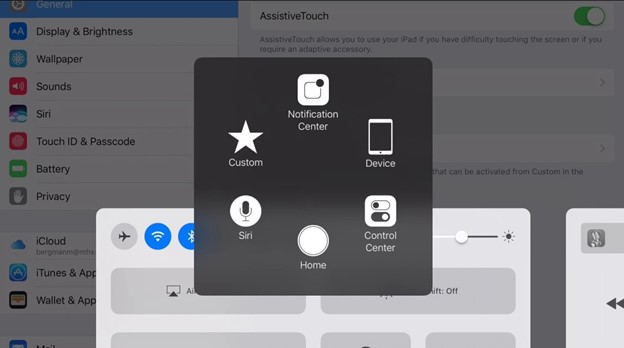
To use Assistive touch, you need to ensure that the feature is enabled on the IOS. But, if it is not enabled, you need to open the settings and tap on to General settings. In General settings, you will see an option of Assistive touch.
Step # 2
Now that Assistive Touch is working, go to the Device option and tap on More. You will be able to see a pop-up menu, tap on “Screenshot.” When you tap the screenshot, you will hear a camera shutter sound and screen flash for a successful capture.
Step # 3
Once you have successfully captured a screenshot. It will now automatically save in the Photos app. You need to swipe to the bottom right corner to view or edit the image.
How to take a screenshot with Apple Pencil on iPad Pro 2020

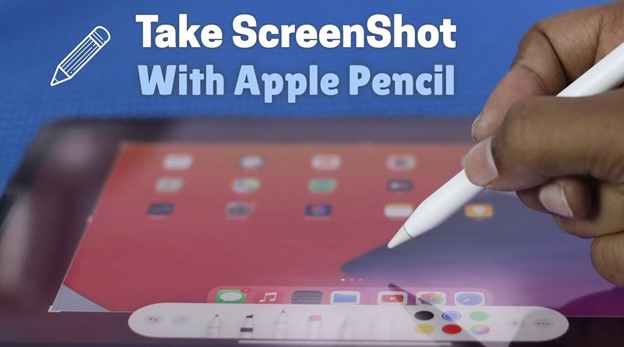
Another way to take a screenshot on iPad Pro is by using an Apple Pencil. You can even take a screenshot of entire web pages immediately edit them in PDFs on an instant markup app.
The overall process is very straightforward if you follow the steps mentioned below.
Step # 1
Bring your Apple iPad, iPad Mini, or iPad Air device to the content you want to take a screenshot of.
Step # 2
Now take your Apple Pencil and place it on the screen. You can set the Apple Pencil either on the lower-left or the bottom right corner of the screen.
Step # 3
Once the Apple Pencil is properly in its place. Now you need to drag it from the right or left corner of your screen to the center. This action will capture a screenshot without pressing any volume buttons or power key.
You can easily view the screenshot image in the photo gallery.
How to edit screenshots using Instant Markup on iPad Pro 2020

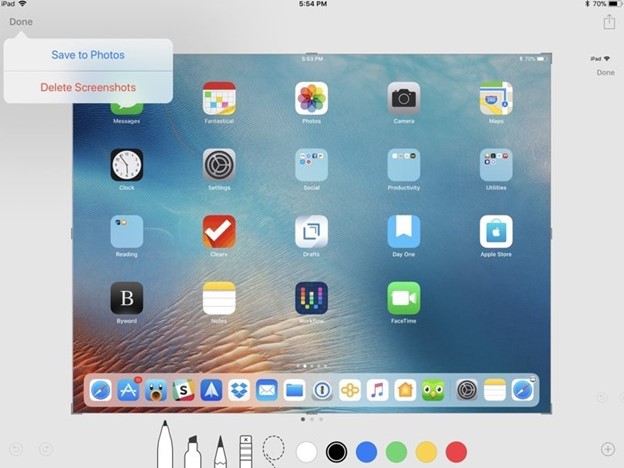
Once you capture a screenshot, you can view its thumbnail on the lower-left corner of the screen. It remains there for a few moments. Then, you can tap on it to edit it in the Markup Mode.
Instant Markup is the easiest way to edit a screenshot on your iPad. You can use an eraser, a marker, or a Magic Rope for annotating or editing the screenshots.
With Instant Markup, you can also change the color in writing on the screenshots to any color you want. You can also crop a particular area of a screenshot image. First, you need to select the text field areas and drag them to the area for the new crop.
How to share a screenshot on an iPad Pro 2020
You can also share the screenshots you capture with different users, friends, or family. Sometimes users also take screenshots of a particular problem to forward to technical support for their assistance. Here’s the easiest way to share a screenshot from your iPad to email, social media, or any other medium.
Step # 1
Open the image to full-size. Now you need to tap on the share icon given in the lower-left corner of the iPad screen.
Step # 2
You can now choose the social media network to share the image on. You can also share the image on multiple social media networks at the same time using the share button.
How to screenshot on iPad pro 2020 video instruction
Final Thoughts
A screenshot helps save the hassle of downloading images. Instead, you can easily capture whatever you like onscreen. Taking screenshots on an Apple Ipad is relatively easy. I hope after going through the information in my article. Now you have a fair idea of how to screenshot on Ipad Pro 2020.
more information on the apple portal: apple.com